Showing posts with label tea. Show all posts

27 Aug 2015

A little bit about lemon coconut slice


One of my favorite flavors is lemon. I love lemon cheesecake, lemon water, iced lemon tea... Sometimes when I crave something sweet but not too sweet I look for lemon recipes.

This time it's a lemon coconut bar.

This is quite possibly the easiest baking recipe, even a kid can do it.

It's almost like a cake, which makes it dessert appropriate too. I think it would be perfect eaten with natural/ greek yogurt- the tang would counteract the sweetness of this slice.

A slice with tea would also make the perfect tea time treat.
Cut it up into cubes and serve it on a high tea platter.
Or larger squares for a bake sale.
I actually halved the recipe posted below but didn't have a tin small enough. So I used my ingenuity and held up the sides with ceramic ramekins :P It worked fine!

I think this lemon coconut bar perfect for those times when you have to bring a dessert or plate to share and you don't have a lot of energy to prepare a cheesecake or cupcakes.
Mix everything in one bowl and while it's baking for half an hour you can get ready for your event. Take it out of the oven and it will cool slightly in the car. By the time you get there it'll be the perect temperature to eat warm!


LEMON and COCONUT BARS
250 gr butter
2 cups caster sugar
4 eggs
1½ cups plain flour
1 cup desiccated coconut
The juice and rind of 2 lemons
Icing sugar to dust

1. In a bowl, melt the butter in the microwave
2. Mix in sugar
3. Add in eggs, one at a time until mixture is glossy
4. Sift in flour and mix well together
5. Add coconut, grated lemon rind and lemon juice
6. Bake at 180C for 30 mins. Test with skewer
7. Let cool and dust with icing sugar


It will keep in an airtight container for 3 days.


And to conclude,

my bffe got married and I got to be her bridesmaid :) We did our own makeup!!!

Signed,

Elisa

12 Jul 2015

How to: icing

I made a whole bunch of mini cupcakes for my friend's wedding afternoon tea.
Thank you Rachel for asking me to bake for your special day! What a privilege.

I've learnt some icing tips and techniques from YouTube- the best school in the world. That's where I learn how to cook, bake, decorate cakes, put on makeup, what fashion is trending etc.
I have this Wilton icing tip set from my auntie. In the middle is the nozzle which you attach to the outside of the piping bag so you can use the same icing bag and change nozzles easily. Brilliant, cause I used one type of icing and five different nozzles.
Here are the ones I used
 Tip numbers from left to right: 7, 97, 106, 101 and 76
And this is the pattern each nozzle makes! Which one is your favorite?
Mine is the rose petals 2nd from right, using tip #101. It takes the longest to do, but you can agree that the result looks intricately beautiful. I think next time I will use two different color icing and give it an ombre effect.

To make the spiral on the leftmost, use a circular tip and pipe from the center outwards, making sure you hold the piping bag vertically.

You can achieve two different effects with the squiggly #97 tip, as seen in the photo. You can start from the centre and use one circular motion to cover the entire cupcake OR you can start from the centre and make a circle one by one going outwards each time.

To make the roses, hold the piping bag so that the fatter end of tip #101 is touching the cupcake. Make a single petal by sweeping in a half circle motion, going around the cupcake starting from the centre.

Finally, the cupcake on the most right is achieved by starting from the centre and going outwards in a circular motion.


The recipe for the buttercream (thanks Reenu) and the cupcakes is in this past blogpost

Buttercream Icing

100g butter (room temp)
1 1/2 cups icing sugar, sifted
1/2 tsp vanilla
1 Tbsp milk

1. Beat butter until pale and fluffy.
2. Add icing sugar and vanilla essence and mix again.
3. Add milk according to the consistency you require.
4. Beat for another 2-3 minutes

Note: The more you beat the paler the icing gets. Mine was still quite yellow, you can beat it for longer or even add coloring.

Add some embellishments like silver cachous and these premade flowers for extra cuteness.


And to conclude,

Worry is imagining life without God.

If you believe in a God that controls everything, a God that is faithful, a God that loves you unconditionally and has the best plan for you... Why are you worried?

Signed,

Elisa

7 Mar 2014

A little bit about cupcakes!

I made cupcakes!!
I've never made cupcakes before (can you tell?)
We only had flower drop tips for icing, which is for making small dots around a cake or something.
I think the cupcakes would've looked nicer with plain circular icing tips.
When i go back to Indo, I'll buy some variation of piping tips so I can do roses like Petal Cupcakes
Sprinkles.
So simple.
And chocolate flakes
Mama got several cans of this Lindt chocolate flakes which you stir into a mug of hot milk to make hot chocolate from Sydney.

The recipe for the vanilla cupcakes and the buttercream icing is exactly the same as the birthday cake I made for a friend a few weeks ago.
It is listed in the blogpost here


jt said this is his favorite baking item of mine. He likes them better than my caramel slice!! Which is saying A LOT.


And to conclude,

The most exciting thing that has happened to me this week- Or even this year! Was being mentioned in this video


I follow her for her makeup tutorials and because she looks like a girl I went to school with.

And she answered my question on her Q&A video!!!
Watch it at the 9:40 mark!

It's even worth it just to watch her try to pronounce my name
<3 u kelly

Signed,
Elisa

13 Jun 2013

A little bit about a bridal shower

Michelle is the first of my friends to get married, and we threw her a bridal shower!


I follow her blog... I love all things pretty and that includes weddings; she writes extensively on her job as a bridal consultant and to-be-bride journey, this is her latest blog post:


Eleven girls of us in the kitchen produced a lot of food together!
We made brownies...
with an alarming amount of sugar and butter in it :p
they were so fudgy; I loved them!

Ham and egg sandwiches and scones...
Cupcakes...
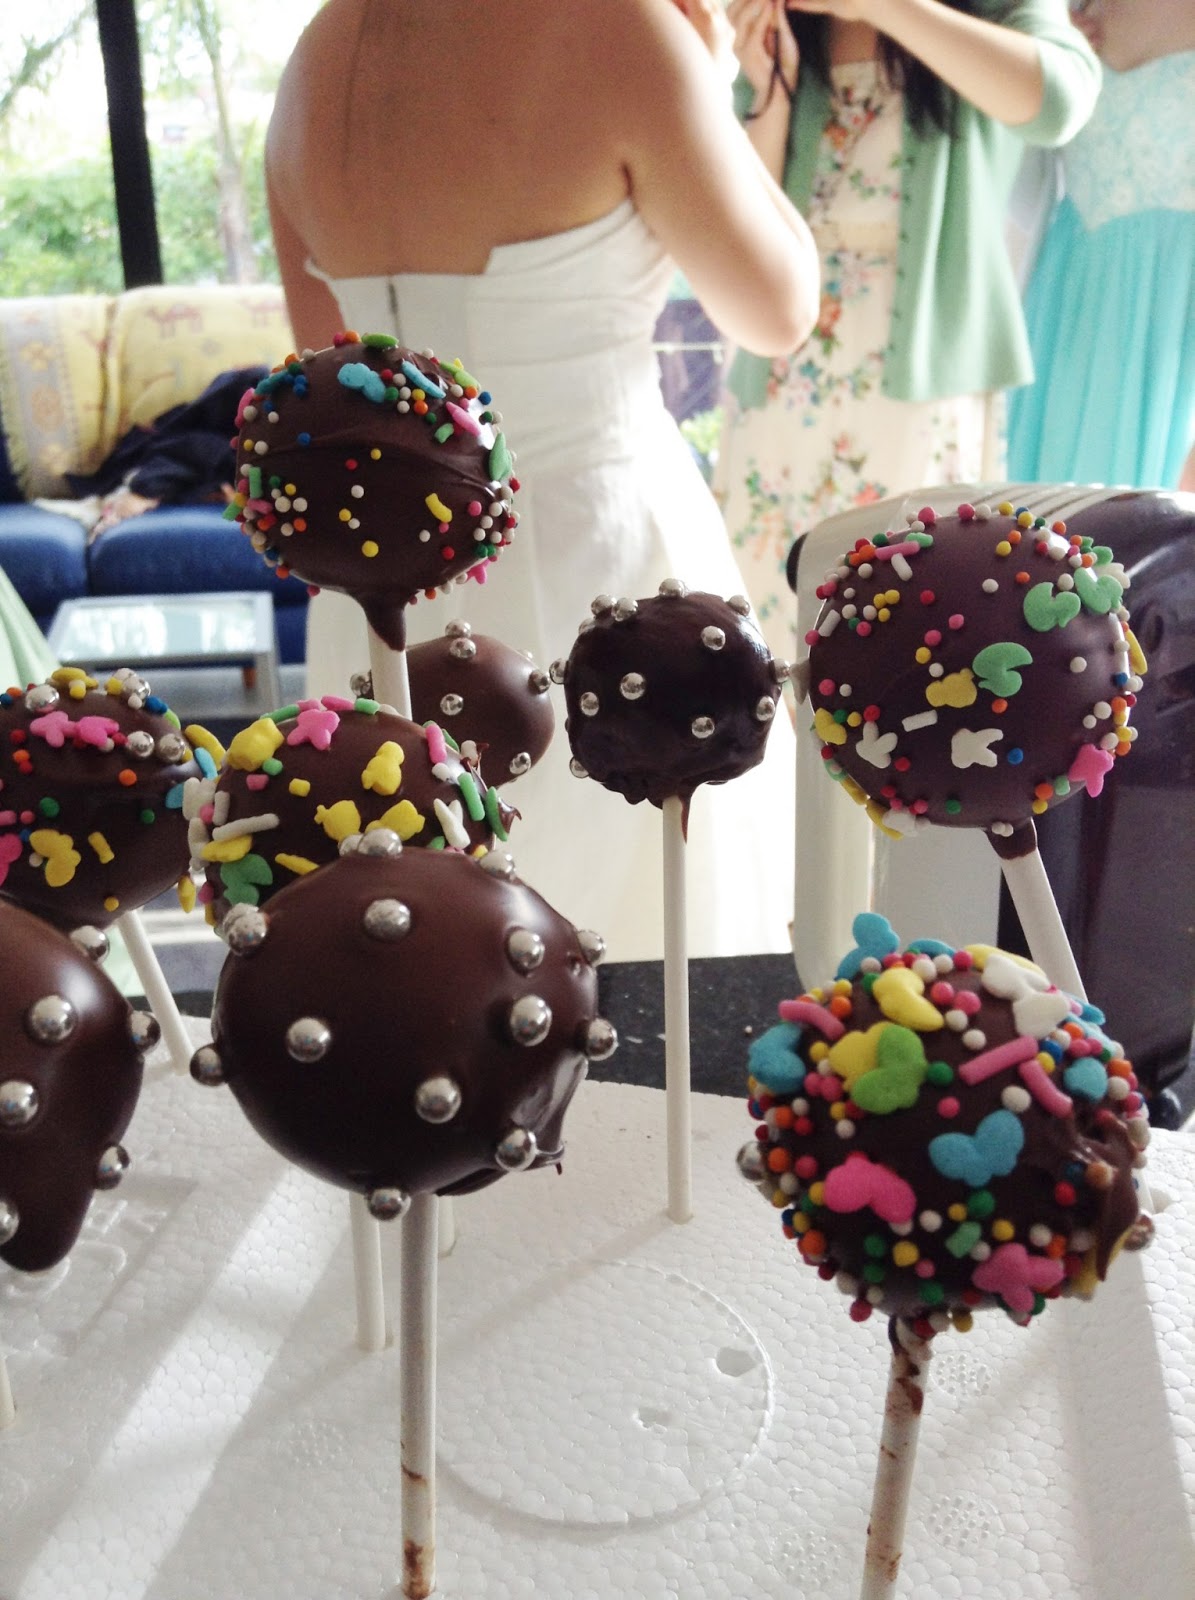
and cake pops!


Cake pops are so fancy looking...

This is the woman's blog who first made them, I've been following her inspiring blog for ages. I always check them for new ideas, although I've never really made much from her site; they look too over the top, with ingredients that aren't usually found in nz

Also perplexes me; how does she have that much patience to decorate baking so neatly??


Making cake pops: 
I started with making a vanilla cake, they were from a betty crocker's packet mix, which came with a packet of frosting! So handy cause we needed the frosting to make the cake pops.

Then we crumbled the cake when it was fairly cool, putting it in the fridge to chill and dry up faster, cause it was still moist.

Ydnim then mixed the packet of frosting with the cake crumbs and rolled them into firmly packed balls to be placed in the freezer for roughly half an hour. This is so they firm up.

When they were firm, we melted dark chocolate and placed it in a deep V shaped bowl for easy dipping.
We had two different pop sticks, regular ones and lollipop ones for making mini cake pops.

Now the trickier part...
Dip the end of the stick into the chocolate, covering about a centimetre and insert halfway into a cake ball.
Dip the cake pop vertically and gently tilt to cover the base of the cake balls.

Careful not to move it while dipping, otherwise the stick will detach and you'll be left with a cake ball inside a bowl of chocolate :p

Holding the cake pop with your left hand, gently tap your left wrist so excess chocolate will drip off and you'll be left with a clean even surface.

Add your sprinkles before the chocolate dries and stick on a styrofoam block to set.


We set up a picnic rug outside and had a nice photoshoot with professional photographers

The photographers are from Cue Photography.
They were so great, they captured great moments and are really friendly.
Especially patient when taking a jump photo of 12 girls :p I totally recommend them!
You can view the album of the bridal shower photoshoot by Cue Photography here https://www.facebook.com/media/set/?set=a.502670243132865.1073741832.435734303159793&type=1


But this is my favorite photo I took :D


A massive congratulations to Michelle and Richard who got married last Saturday.
The ceremony was beautiful...
Ydnim and leeynaffit performed the most romantic song, A Thousand Years [they have informed me they take bookings. Even advanced ones.] and the bride and groom walked down the aisle at the end to Taylor Swift's Love Story <3

One of many weddings to come!
God bless you two always.


And to conclude,

I got to be part of the engineering revue again this year as a dancer!
To those of you who missed it... You missed out on a great show. We sold out 3 out of 4 shows!!
I had such a great time, became friends with some... interesting people ;) and got to ride a segway for the first time...
Karl Stol (engineers would know him from first year, 121 mechanics paper) was in the revue and he brought along his segway.
Oh my so scary, I screamed so loud when I first got on hahaha... was not prepared for that.

Signed,
Elisa

1 Dec 2012

Microwave brownies, the recipe

To those of you who asked for it:
Lauren's recipe of Jess's brownies passed on to me

Seriously good brownies! Made in the microwave in just 4 minutes


MICROWAVE BROWNIES
2 eggs
1 cup sugar
1 tsp vanilla 
100gr butter, melted
1 cup flour  
1/2 cup cocoa
1 tsp baking powder
1/2 c chocolate chips 

1. Beat together eggs, sugar and vanilla.

2. Drizzle in melted butter, continue to beat.

3. In a seperate bowl, sift together flour, cocoa and baking powder.

4. Mix together with egg mixture by hand and add chocolate chips.

5. Spoon into a lined microwaveable container or dish and microwave for 4 minutes (times may vary). Test with a toothpick


Yes it only takes four minutes in the microwave! Perfect for impromptu dessert or tea. You can sit there watching it 'bake' away. lol jks microwaves are dangerous...

Yesterday when I made this, I substituted the chocolate chips with 3 rows of chopped dark chocolate and added a handful of hazelnuts. Yum. Serve warm with ice cream, or cold with strawberries :)

7 Nov 2012

A little bit about almond chocolate coffee cake!

I had half a packet of almonds leftover from exams. Apparently nuts are good study food?
Well I learnt it's not about the food you eat or how hard you study, it really depends on how mean your lecturer is when it comes to exams. I don't know who could've finished that Civil211 exam in two hours and gotten half of it correct... No hard feelings, Piotr, really.
Anyway, I snacked on almonds cause I didn't want to take fish oil pills.

This morning I felt the urge to bake and I came across this marvellous site
http://www.verybestbaking.com/

There were recipes and mouth-watering photos of chocolate caramel brownies, fudge, Christmas cookies with red and green chocolate chips, apple and pumpkin loaf, chocolate filled braids and... Almond-chocolate coffee cake!

So I got out of bed and began baking.

 Half a cup of roasted unsalted almonds, to be chopped coarsely
1/3 cup of firmly packed brown sugar
I got this cute measuring shot glass to measure tablespoons and millilitres
Mix into a bowl with chopped apricots, coffee granules, cinnamon and chocolate chips
Spoon half the cake batter into the tin and sprinkle half the nutty mixture on top
Repeat with the remaining then bake!


Almond chocolate coffee cake

1/2 cup chopped roasted unsalted almonds
1/3 cup brown sugar
1/4 cup chocolate chips
1 Tbsp cocoa
1 Tbsp coffee granules
A handful of dried apricots, chopped (about 5 pieces)
3/4 tsp cinnamon
2 3/4 cups flour
1 1/2 tsp baking powder
1 1/2 tsp baking soda
1/2 tsp salt
170g butter, softened
1 1/2 cups white sugar
1 tsp vanilla
3 eggs
2 cups yogurt (I used vanilla)

1. Preheat oven to bake at 180C. Line or butter a baking pan

2. Combine almonds, brown sugar, chocolate chips, cocoa, coffee, chopped apricots and cinnamon in a bowl.

3. Combine flour, baking powder, baking soda and salt in a different bowl.

4. Beat softened butter with an electric mixer until light and fluffy. Add sugar and vanilla then beat for 2 minutes. 

5. Add eggs one at a time, beating after each addition, until mixture is smooth. 

6. Alternately add the flour mixture and yogurt; beginning and ending with flour mixture. Mix until smooth. 

7. Spoon half the batter into the prepared pan. Spread half the nut mixture on top; repeat layers.

8. Bake for 1 hour or until wooden skewer inserted near center comes out almost clean. Cool in pan on wire rack for 10 minutes before carefully turning cake out onto rack.
Improvements for next time:
More chocolate chips.
It's surprisingly soft! The almond, coffee and brown sugar sprinkling added a nice crunch to it.
I think it's really nice served warm with the leftover yogurt

And to conclude,
I read a really nice bible verse last night

Colossians 4:6 "Let your conversation be always full of grace, seasoned with salt, so that you may know how to answer everyone."

Signed,
Elisa

8 Oct 2012

A little bit about The Chocolate Boutique Cafe

Have you been to the Chocolate Boutique in Parnell?

They serve coffees, hot chocolates, waffles, sundaes, cakes, desserts and little chocolate treats.

Wally took me there for my first time a couple of weeks ago. I asked around for my friends' opinions on this cafe. I think everyone I asked had been there before and tried the Italian Denso (thick and rich hot chocolate drink, which Hiro said is almost like a mousse texture).

It took a good 10 minutes to look through the extensive menu. I couldn't decide between hazelnut cappuccino, peanut butter mocha, creme de menthe chocolate, chilli denso, praline hot chocolate, white chocolate submarino (a submarino is a mug of hot milk served with chocolate, as you stir the chocolate in it melts to create a hot chocolate drink) or affogato ($4 - $5.50)

And those were just the drinks. They served chocolate, maple, caramel waffles ($7.90), raspberry tarts, kahlua cheesecake, chocolate mud cake, eclairs.
I settled on chocolate waffle and a mochaccino
Wally told me how she got a Death by Chocolate last time; chocolate ice cream, chocolate mousse, chocolate sauce. Never again :P
So she got a chocolate mud cake.
I took this photo really quickly because it was melting in the rare September sun
I like how the drinks came with a chocolate mint. Nice touch.

And then Calci took me there for my birthday! I have lovely friends.
Praline hot chocolate ($5.50)
with hazelnut chocolate melted in the bottom of the mug. Yum
Waffles with hokey pokey ice cream and butterscotch sauce.
Delicious
Calci got chocolate waffles and a cappuccino. She said the coffee was good
And she also ordered a cupcake (they have gluten free ones!)
And then pulled out a candle!
I got so excited.
Make a wish, Elisa!
Overall, very satisfied.
Good food, extremely well priced, especially for a boutique.
Although there are only a couple of tables, so I can imagine how busy it would get in there in the evenings.
Next time: sundaes and submarino. Maybe an Italian Denso to share!

The Chocolate Boutique Cafe
323 Parnell Rd, Parnell
11am to 10pm daily

And to conclude,
I passed a store in Parnell and saw an art print.
The Angelus 35 x 25cm print
The original oil painting was done in 1857 by the French realist, Jean-François Millet.
I had been eyeing a larger print seen in a second-hand store in Onehunga. But found this one for $5 :D
What got me captivated by this painting was Salvador Dali's take on it. Read here :)

Signed,
Elisa.